Thanks, I’ll go buy some. Cheap enough to experiment with.
As usual the eBay sellers have no idea what they’re selling, someone does have a listing for some red stuff.
I needed a belt for a table lift and it was a bit hard to get one that was the right length ‘off the shelf’. Only light duty stuff needed so this looks like it’s work just fine.
Tony
From: Homebrew_PCBs@yahoogroups.com [mailto:Homebrew_PCBs@yahoogroups.com]
Sent: Friday, 19 February 2016 10:45 AM
To: Homebrew_PCBs@yahoogroups.com
Subject: Re: [Homebrew_PCBs] Re: Drilling circuit boards on the cheap:
The color seems to be related to the material the belt is made of but this seems as well to be changing from one manufacturer to the other one !
Some years ago, I browsed the net and the result was rather misleading. About the Chinese belt, I think that there are not so numerous manufacturers to make it and the green one with a rough surface is sold for that use. I'm satisfied with it, My opinion is that you can go safely with it.
I'm quite embarrassed to give it a name ! Sellers are saying "belt sold per meter".
This belt is often listed in the conveyor replacement parts on their catalogs.
Regards
On 18.02.16 10:12, 'Tony Smith' ajsmith1968@... [Homebrew_PCBs] wrote:
Huh, the world is full of things you didn’t know exists.
I wanted something like that a few years ago when I needed a custom belt.
Does it have an actual name, and does the colour mean anything?
Thanks!
Tony
From: Homebrew_PCBs@yahoogroups.com [mailto:Homebrew_PCBs@yahoogroups.com]
Sent: Thursday, 18 February 2016 9:17 AM
To: Homebrew_PCBs@yahoogroups.com
Subject: Re: [Homebrew_PCBs] Re: Drilling circuit boards on the cheap:
on eBay, you can find nylon wire specifically made for belt building. Choose a 5mm dia, green color this the best one for the Unimat lathes. It doesn't expand like the genuine rubber ones do.
Follow this URL, it's a typical example: http://www.ebay.com/itm/1-meter-green-Watchmaker-Lathe-Transmission-Belt-/321156538194?var= <http://www.ebay.com/itm/1-meter-green-Watchmaker-Lathe-Transmission-Belt-/321156538194?var=&hash=item4ac66bdf52:m:mkPRJr72969WaERlVx3rWrw> &hash=item4ac66bdf52:m:mkPRJr72969WaERlVx3rWrw
Cut a length compatible with your pulley set plus 1 mm. It's preferable to measure on the lathe than to copy a broken belt. Melt the ends together with a small flat metal piece mounted into a soldering iron. I made one from a stainless steel broken knife and I'm using an old 100W soldering iron. 60W might be enough.
Put it in between the two ends of the nylon wire, gently pressing them together and when a small ridge begins to grow, remove quickly the hot metal tip, pushing the ends together, maintaining the pressure between the two ends during 20 to 30 s. With a little bit of practice, you'll be able to perfectly align the ends. When done, cut the ridge and file it or sand it.
I've been using these home-made belts for years, not only for the lathe and I had only one failed, the first belt I made. The iron was probably not hot enough. I repaired it, Still alive !
Now I've hacked a pliers to deal with several diameters and ease the job.
On 17.02.16 02:47, Harvey White madyn@... [Homebrew_PCBs] wrote:
On Tue, 16 Feb 2016 19:52:19 -0500, you wrote:
>A friend of mine used to use something called a unimat to drill his boards. It was belt drive,but also converted into a lathe. I borrowed it when I did some boards a long time ago
>
It's very precise, a combination of lathe, drill press, and almost
anything else. It's also quite expensive since it is a collector's
item at this point.
Its weak point is also the strong point, versatility. However, every
setup needs to be squared and trued. It has minimal capacity, but can
do beautiful work when properly adjusted.
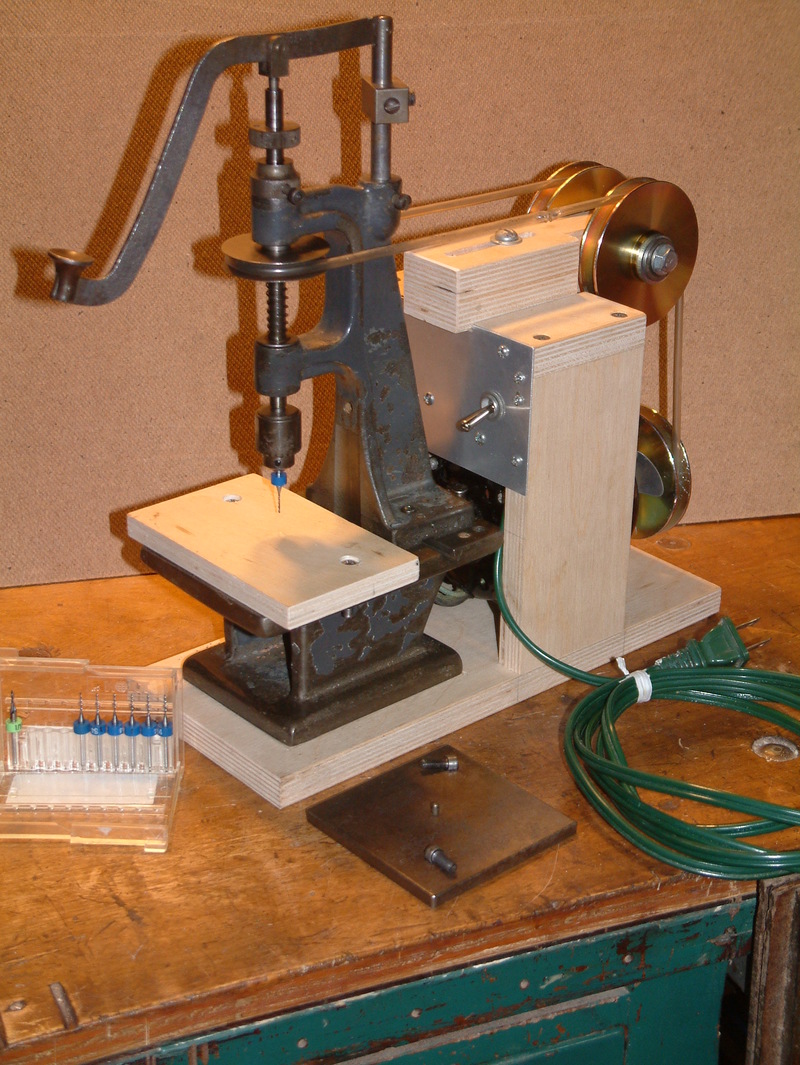
The belts have limited life and are somewhat annoying to find
replacements for.
It can be a very high speed drill press, about 15K RPM IIRC.
Harvey
Show quoted textHide quoted text
>
>
>From: Homebrew_PCBs@yahoogroups.com [mailto:Homebrew_PCBs@yahoogroups.com]
>Sent: Tuesday, February 16, 2016 9:58 AM
>To: Homebrew_PCBs@yahoogroups.com
>Subject: [Homebrew_PCBs] Re: Drilling circuit boards on the cheap: [1 Attachment]
>
>
>
>
>
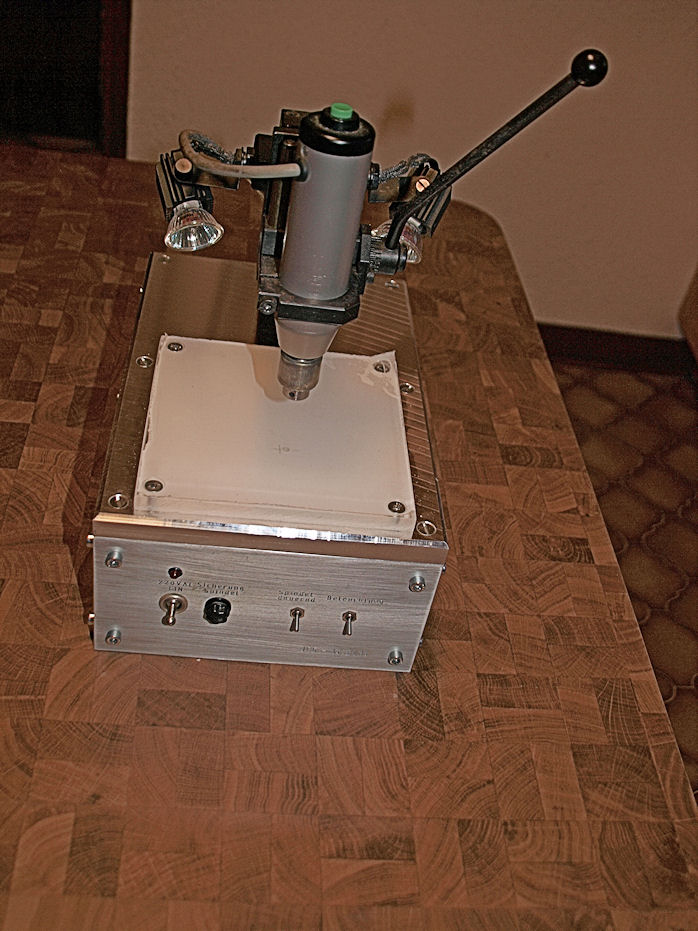
>This is what I use for small boards. It only has about an inch and a half throat but is very stable. I think it was used by clock makers but there is no information available for it.
>
>