Thanks. I am unable to control anything bute note changes and
transpose functions via MIDI, which is why I was buggering around
inside in the first place. I would have no issue if I could access
all the functions, but for some reason I am unable to do so when I
attempt control from another synth.
I have a fairly lengthy document regarding cc's and what not for this
machine, but to be honest I'm not familiar with sending these types
of messages from a software controller.
--- In chromapolaris@yahoogroups.com, David Clarke <ac151@...> wrote:
>
> From: "teknowh0re_1999"
> ...
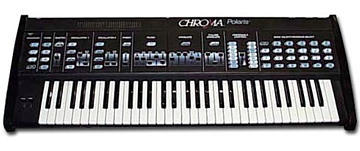
> > I've owned my Polaris for about a year now, and it has the
infamous
> > membrane button death. I've opened it up a time or two but not
gotten
> > too adventerous until tonight. Long story short, the jumpers
> > connecting the PCB to the membrane panel are pretty much dead
(deader
> > than they were). But when I say "jumper" I mean "leads in a thin
> > plastic sheet."
> >
> > Can I simply solder in some jumper cable or wires from the PCB to
the
> > membrane panel or do I need to think about using this machine for
> > spare parts?
>
> If the problem is with one or more of the plastic strips that come
from the
> front panel and slide into connectors on the circuit boards, then
soldering
> will be tough.
>
> The plastic/mylar normally has a conductive coating on it, and
that's what
> transfers the signals to the circuits.
>
> The most common polaris sickness will be a cracking of that
plastic - and as
> the plastic cracks, the signal traces are broken. In many cases,
the
> cracking occurs at the end of the connections - and so you can get
lucky by
> trimming off the bad end with a pair of scissors.
>
> If the crack/rip/tear is too far away from the connectors to make
cutting
> likely, then there are a couple alternatives:
>
> 1) Try to physically repair the crack by gluing/attaching another
piece of
> plastic to the broken piece. This will not necessarily repair the
> electrical conductivity, but it will be the mechanical support for
the
> connection. Once mechanically secure, the trace itself can
sometimes be
> repaired via a 'conductive ink pen'. They sell these at
electronics stores
> (and on-line), and they're specifically made for this sort of a
task. You'd
> hold them like a pen, and then 'draw' the connections you need.
Once dry,
> the connections can pass the signals you need.
>
> 2) A slight variation of #1 (and this is if you're desperate),
would be to
> try to 'stitch' a fine wire back and forth between the broken
track. (Think
> of it just like a needle and thread - but instead of holding
material
> together, you'd be holding the traces together). Certainly not
ideal, and
> depending how brittle the connector is, may cause more damage than
it fixes.
>
> You can have even more variations, with wires being fished up
between the
> layers of the front panel - but these are really last-gasp sort of
> solutions.
>
> 3) If all else fails, then you'd be looking to forego the use of
the actual
> membrane switches, and to add in your own switches (which you'd
wire in with
> real-wire instead of the plastic). These switches could be mounted
right
> on/through the original panel, or they could go in an external box.
>
> In the short-term, it is the case that the parameters can be
controlled from
> MIDI - so an external MIDI knob-box (or access from a sequencing
program)
> could be used.
>