michael3442@... ... wrote:
... the area of difficulty is getting the tree tips to show against the overcast sky, when the tips range from slightly darker to lighter than the sky. It's like masking blond hair against a white background. ...
First, that's a very nice image and worth doing some work to perfect.
Looking at the scan, was the original a 16 bit? Given the gray nature of the image, you'll need as many bits to play with as possible.
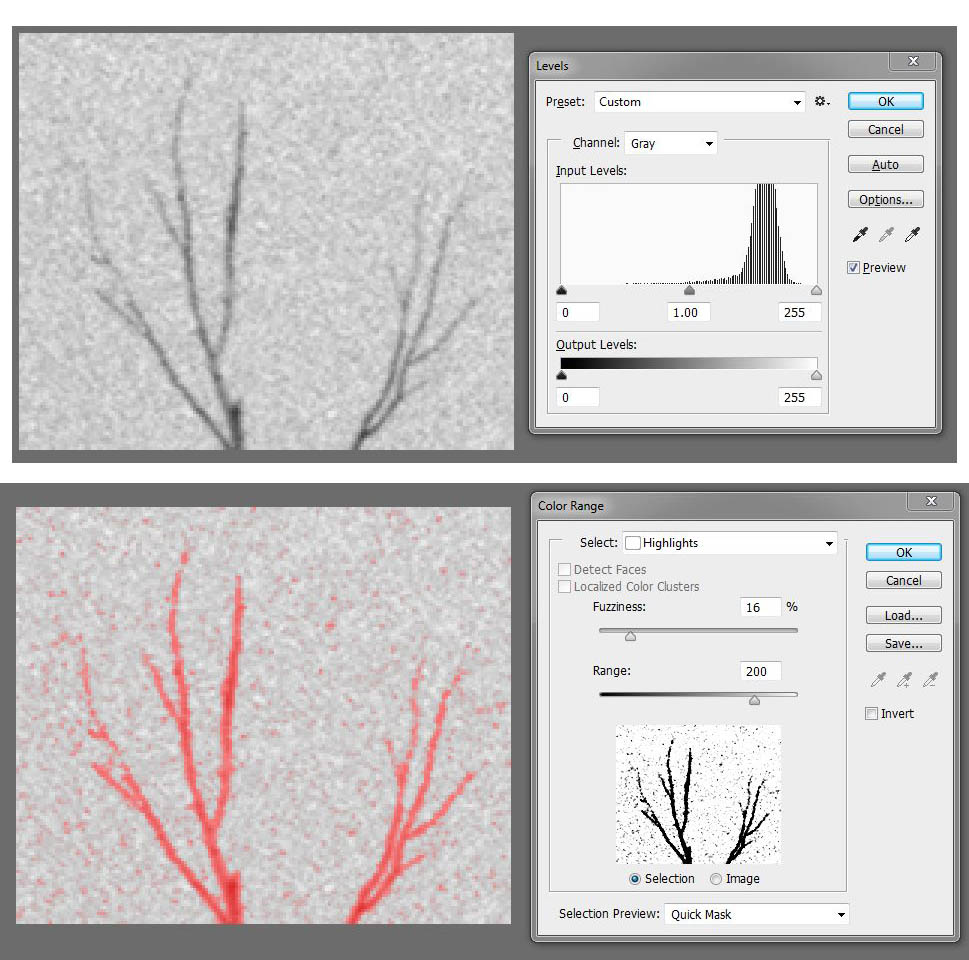
Separating the tree tips from the sky is a problem in lots of my work. With your image the signal to noise ratio -- that is, the detail you want compared to the film grain -- is so low at the tree tips that no single PS tool is going to do it "automatically" for you. What I find is that selecting by Highlights (PS CC) can get me close. Then you'll just have to paint in the final missing segments. Once you have the subject matter masked, you can wipe out the grain.
I've posted some screen shots of the tree tips at 300% at
(Although not applicable here, I might add that one reason I like shooting RGB digital even though B&W is my target, is that with the color information often selecting by color range is more accurate than is possible with B&W film. Also, the noise is usually lower with modern digital. I use CS5 for selecting by RGB color range, however, because I just don't get PS CC's color range approach.)
BTW, did you want the sky to be featureless? There is enough information in the scan to show that there was a cloudy sky there.
Back to the tree tips, I sometimes find when burning a sky that doing it a little at a time with different feathering of the mask can help. Yesterday I just "painted in" a burned sky manually using different sizes of brushes. I make a duplicate layer, darken it, and then "paint in" the effects with the eraser tool on the top layer.
Often good images take a lot of work, but that is what separates them from the mundane.
Good luck with this one.
Paul