Michael,
I actually like CS5 better for some things, and the workflow I use works with it.
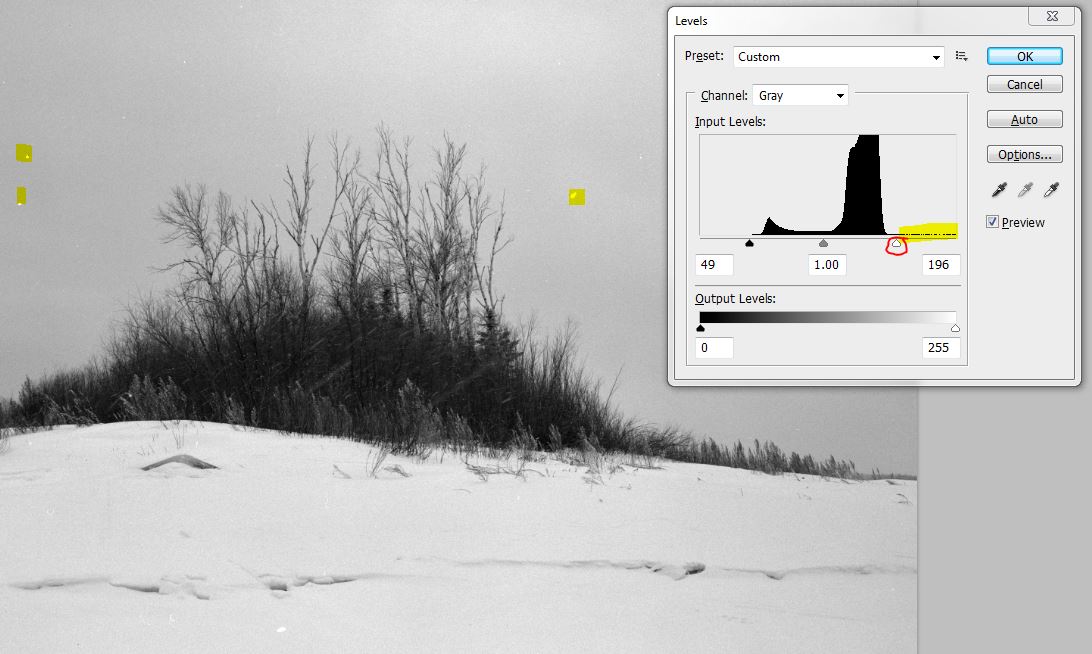
The first thing I'd do with the scan is use levels to get better contrast.
Use the slider (red circle) while holding down the Ctrl. key to see where your highlights really are, as opposed to the holes in the film due to dust, etc. All of the things to the right of the slider are non-image specks of dust.
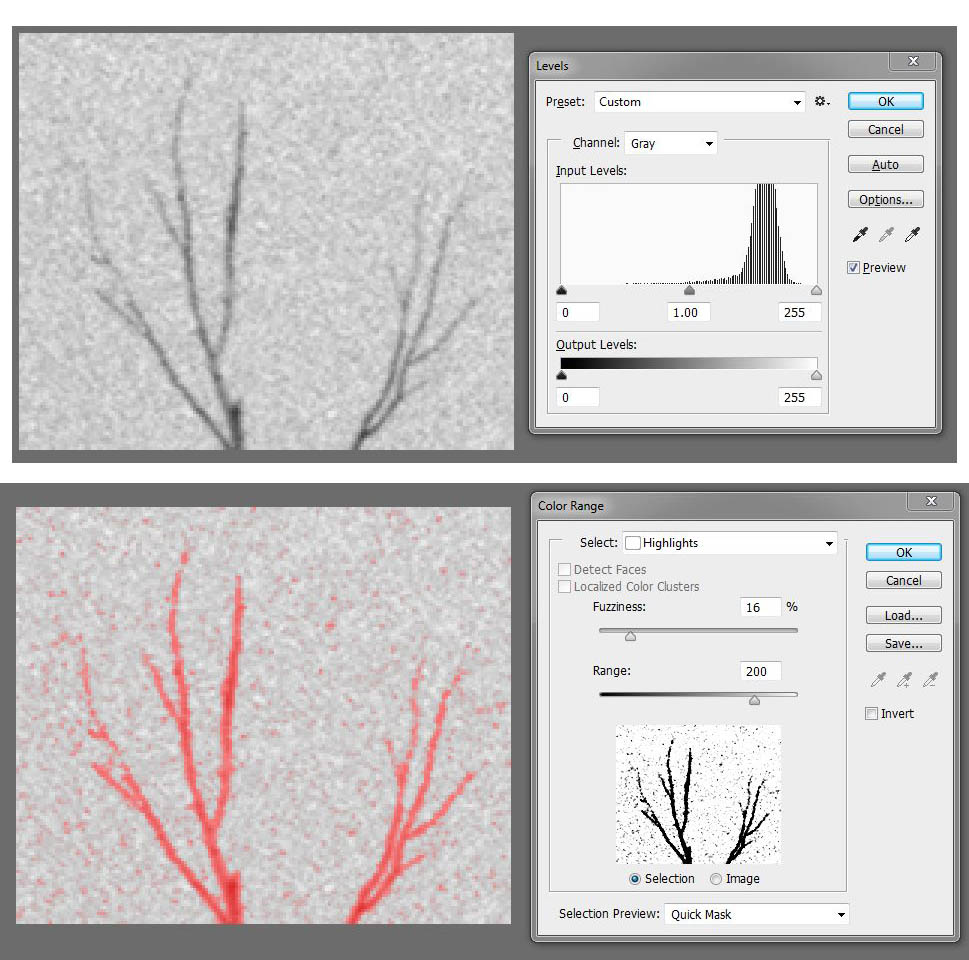
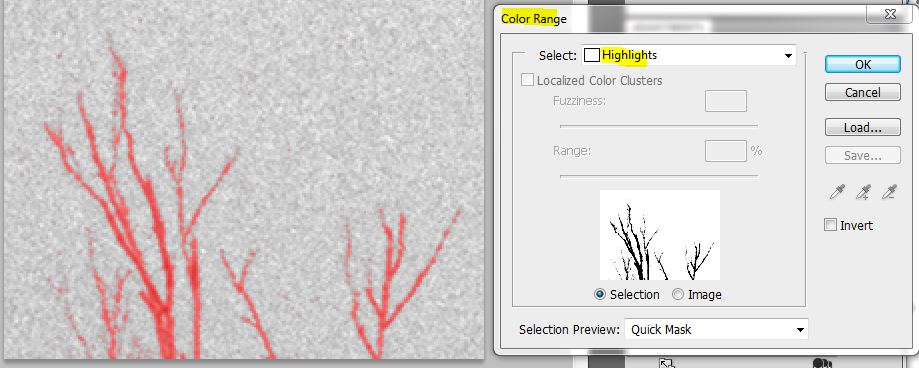
I would probably try using masks/selections so that I could clean up the sky/clouds and separate them from the twigs. CS5 has selection tools similar to CC, but the selection by Highlights (Select>Color range>Highlights) is not as flexible as the CC version.
I think defining the color range for selection in CS5, however, is easier than in CC.
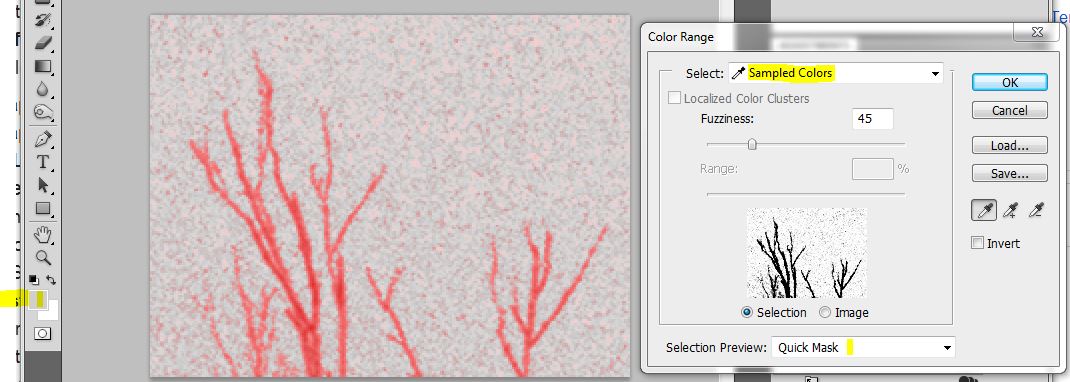
I used the eyedropper with a sample area of 11 pixels to sample the sky.
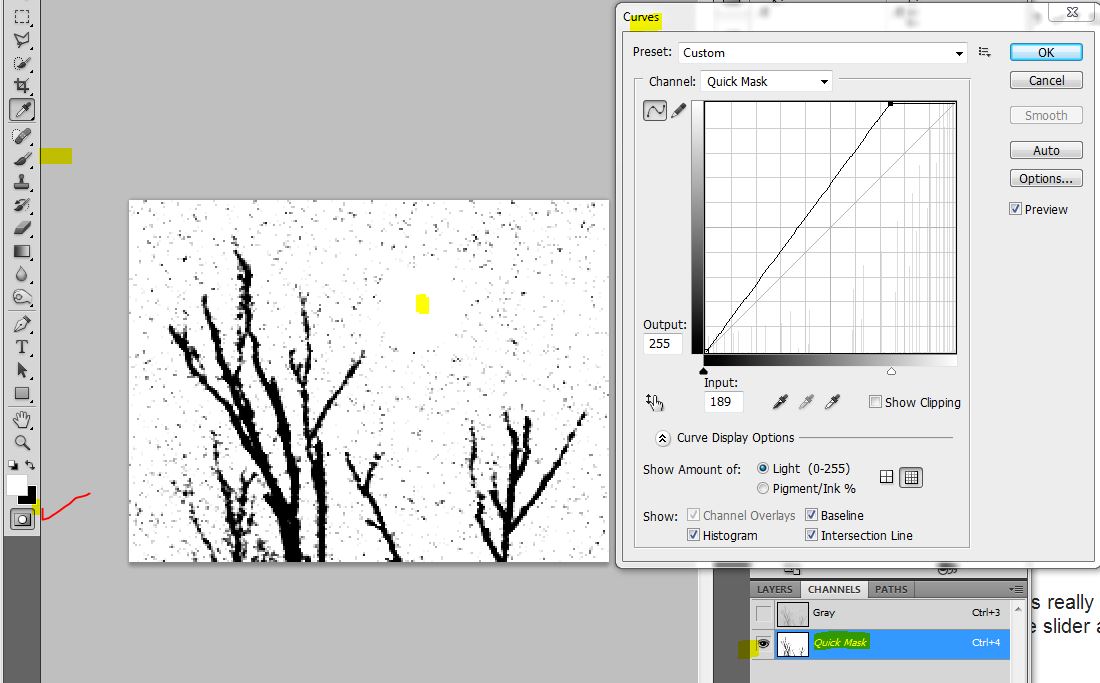
Once an initial selection is made, turn it into a workable Quick mask (button checked red in the screen grab, below).
Then with only that channel selection, you can work on it as if it's an image. If there is too much grain showing, try the curves tool as shown. Also, use the paintbrush to get rid of grain.
When I select by color range, I often make several (many) different masks for different parts of the image. Typically when I want to select the sky, for example, I'll sample the color/gray level with the eyedropper in one small area and select by that color. It may be good only for that area, not the entire sky. So, I save that selection and go an area where the sky border was not well selected, take another sample, and make another selection by color range. These selections can be combined by pulling up the first one and making it into a Quick Mask. Then pull up the second selection and use the paintbrush to transfer that selection, where it is better than the first one, to the quick mask. Then convert back to a selection and save it.
Making good masks takes some work, but once you have a good one that separates the interesting image material from the sky or clouds, you can then accentuate what you're interested in -- like the detail of the trees.
There are lots of different ways to work up images in PS. Obviously making detailed masks only make sense for images that you think are worth the work. If an image is really good, however, being able to deal with one part of it at a time really helps. Selections/masks can help do this.
We still "paint with light," but in the computer it can be so much more accurate than with hand dodging and burning under the enlarger. I used to make heavy paper masks for enlarger work. They were more accurate than the simple pre-made ones of hands, but PS allows a whole different level of accuracy that the old masters would be very envious of.
It9;s a long learning curve.
Paul